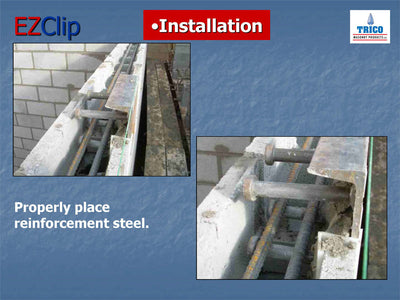
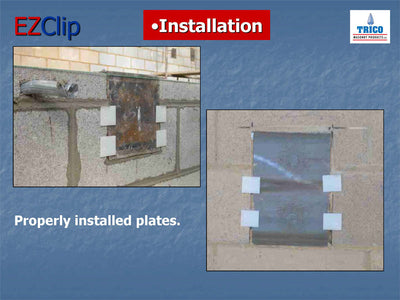
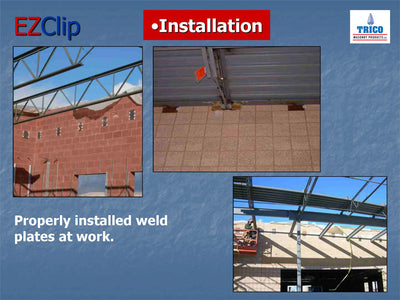
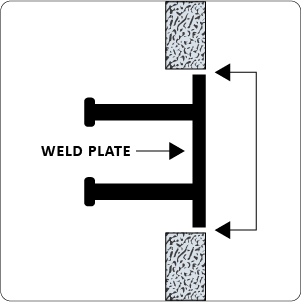
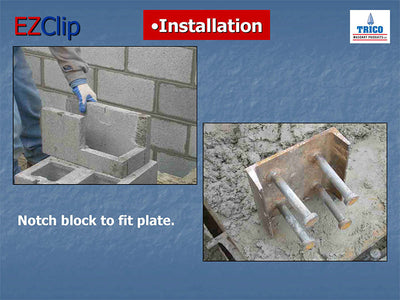
Installation
![](http://tricomasonryproducts.com/cdn/shop/files/step1.webp?v=1698740947&width=301)
STEP 1
Cut opening plate height plus 5/16”
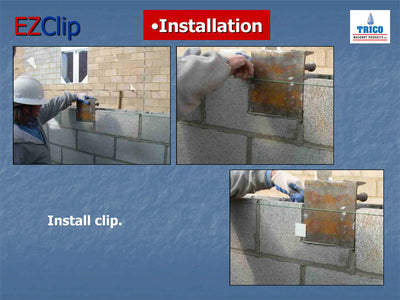
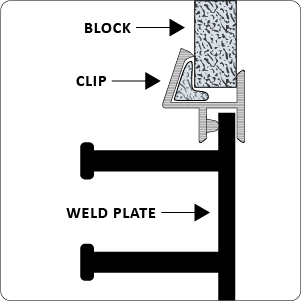
![](http://tricomasonryproducts.com/cdn/shop/files/step2.webp?v=1698741452&width=301)
STEP 2
Apply mortar to the angled interior inside of slip. Slide slip over edge of block.
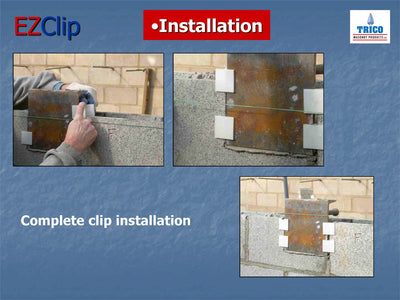
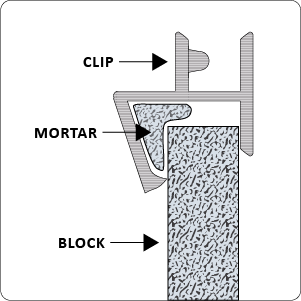
![](http://tricomasonryproducts.com/cdn/shop/files/step3.webp?v=1698741688&width=301)
STEP 3
Slip the weld plate into position. Mortar second clip and install upside down on top of block.
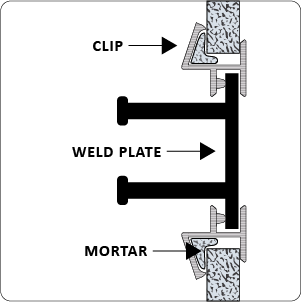
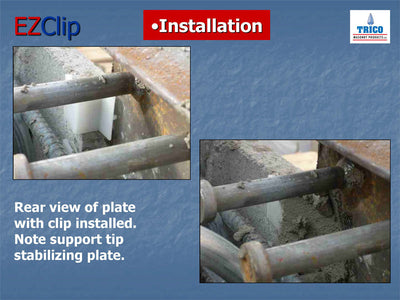
![](http://tricomasonryproducts.com/cdn/shop/files/step4.webp?v=1698741854&width=301)
STEP 4
Set top block with clip installed over weld plate. Allow mortar to dry completely before grouting.
![](http://tricomasonryproducts.com/cdn/shop/files/EZClip-Applications_Page_13.jpg?v=1698748102&width=400)
![](http://tricomasonryproducts.com/cdn/shop/files/EZClip-Applications_Page_14.jpg?v=1698746023&width=400)
![](http://tricomasonryproducts.com/cdn/shop/files/EZClip-Applications_Page_15.jpg?v=1698746042&width=400)
![](http://tricomasonryproducts.com/cdn/shop/files/EZClip-Applications_Page_16.jpg?v=1698746075&width=400)
![](http://tricomasonryproducts.com/cdn/shop/files/EZClip-Applications_Page_17.jpg?v=1698746091&width=400)
![](http://tricomasonryproducts.com/cdn/shop/files/EZClip-Applications_Page_18.jpg?v=1698746109&width=400)
![](http://tricomasonryproducts.com/cdn/shop/files/EZClip-Applications_Page_19.jpg?v=1698746136&width=400)
![](http://tricomasonryproducts.com/cdn/shop/files/EZClip-Applications_Page_20.jpg?v=1698746163&width=400)
![](http://tricomasonryproducts.com/cdn/shop/files/EZClip-Applications_Page_21.jpg?v=1698746185&width=400)